
How to Create and Manage a Run Group
Learn how to group tests for easier management.
Run groups make it easy to execute multiple tests together. Run groups can be scheduled or executed ad hoc. For more information on what a run group is, see Organizing Tests by Run Group .
Creating a Run Group
- Click the Run Groups tab.
- Click the Create Run Group button to launch the New Run Group modal.

Creating a run group.
- Name the run group.
- Select a schedule for the run group (optional).
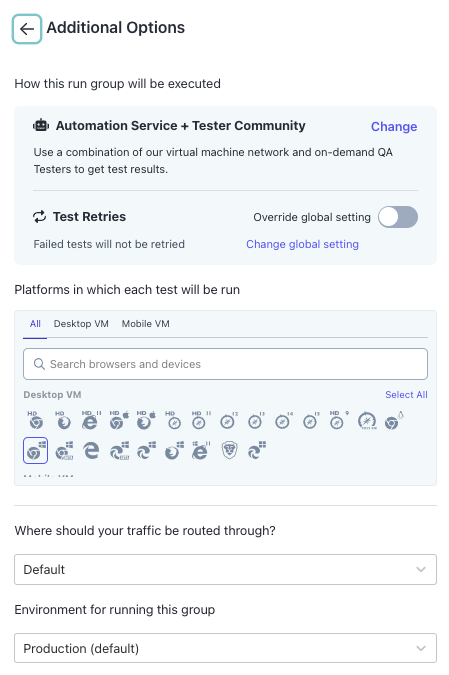
Run Group additional options.
- Under Additional Options, set:
- How you want to execute the run group
- Number of Test Retries
- Run group platforms
- Where traffic should be routed
- Environment
- To save, click Create Run Group.
- Run group settings can be changed by clicking the Edit link on the Settings panel.
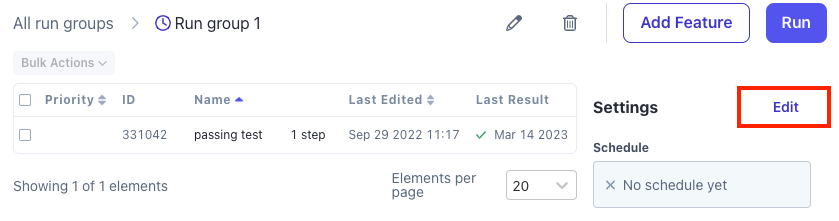
Editing the run group settings.
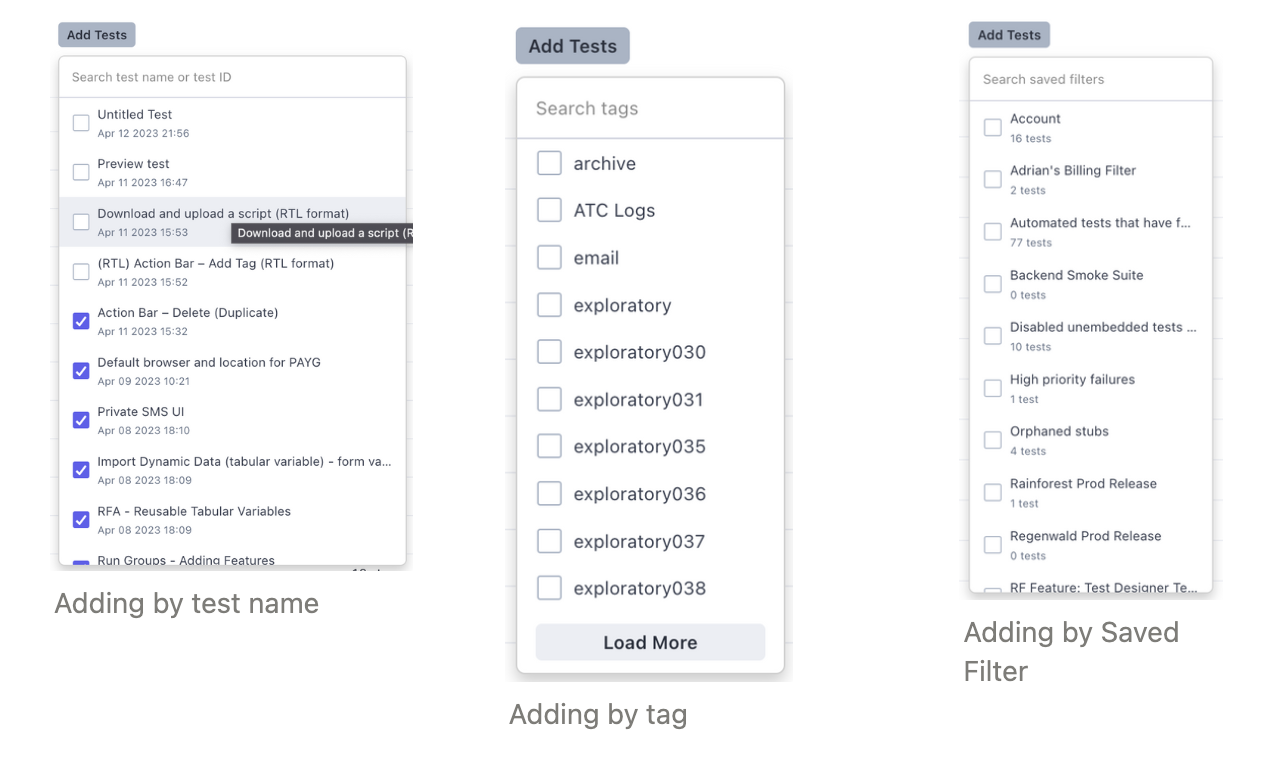
Adding Multiple Tests to a Run Group
At the top of a run group’s page, click the Add Tests button to add tests to the run group based on test name, saved filters, feature, or tag.
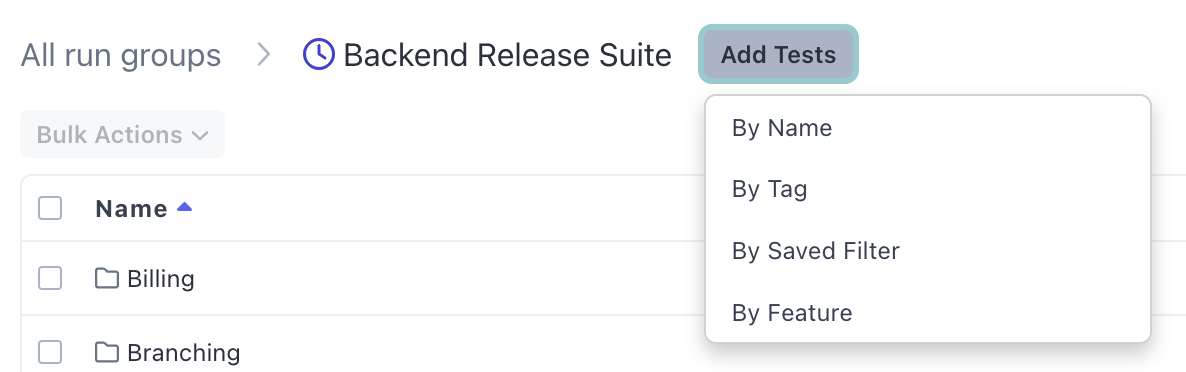
Once you select one of the four options, you can select the specific test(s) or criteria.
Adding Saved Filters to a Run Group
You can also also add tests to a run group directly from the Saved Filters page.
- Click Saved Filters in the navigation bar.
- Select the Filter you want to add to the run group.
- Expand the 3-dot icon dropdown and select Add to Run Group.
- Select the appropriate run group from the pop-up menu.
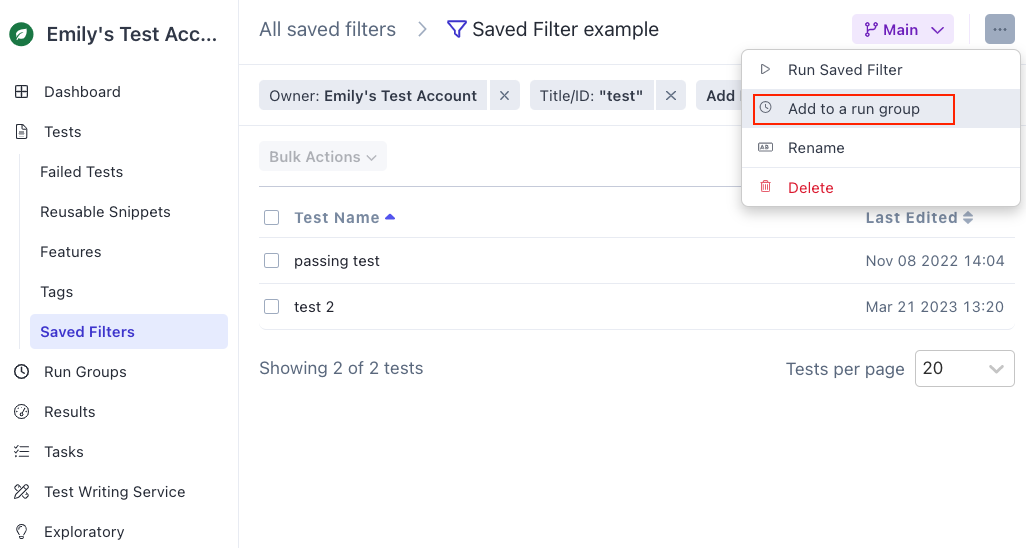
Adding a Saved Filter to a run group
Editing Run Group Membership in Test Settings
- Navigate to the individual test.
- Click the Settings icon (gear).
- To add the test, select the run group from the Run Groups dropdown.
- To remove a test, click the “X” in the Run Groups dropdown.

Adding and removing an individual test to a run group.
If you have any questions, reach out to us at [email protected].
Updated 4 months ago