How to Send Test Failures to Jira
Learn how to create Jira tickets from Visual Editor test failures.
Overview
Rainforest supports creating Jira tickets from failed run results. You can create tickets rich in information about the test failure, including tester logs, comments screenshots, and the test result in Rainforest. Put the results into sprints to address the failures as part of your existing software development process.
There are two options for Jira integration: automatic reporting and manual reporting.
Enabling Automatic Error Reporting for Jira
By default, setting up Jira integration enables automatic error reporting.
- Complete the steps to set up Jira integration in Rainforest. For more information, see the Jira integration article.
- Navigate to the Integrations settings page in Rainforest.
- Find a previously configured Jira integration under Test Failure.
- Ensure the “Enable manual error reporting” checkbox is unchecked.
- Click Save.
Jira Ticket InformationWhen a test fails, Rainforest automatically creates a separate Jira ticket for each failed platform. The title appears in the format
[your project key]-number. As an example, for the Rainforest project RFT, the title might be RFT-1.
Troubleshooting
If tickets are not being automatically created, please ensure that there are no open or in progress tickets for the test you are working on. New tickets will not be created until the previous ticket is resolved or removed.
Please reach out to the team at [email protected] for additional troubleshooting support.
Enabling Jira Manual Error Reporting
Perform the following steps to override automatic error reporting.
- If you haven’t do so already, complete the steps to set up Jira integration in Rainforest.
- Navigate to the Integrations settings page in Rainforest.
- Find a previously configured Jira integration under Test Failure.
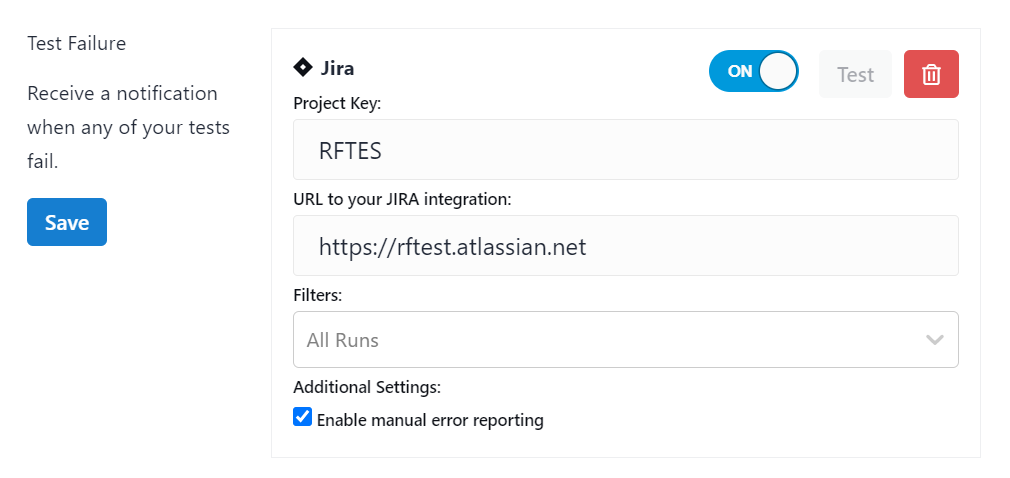
- Under Additional Settings, click the “Enable manual error reporting” checkbox.
- Click Save.

JIRA Integration with Manual Error Reporting enabled.
Sending Test Failures to Jira Manually
Now that manual error reporting is enabled, select which failed results you want to use to create a Jira ticket.
- Navigate to a failed test result by clicking the red X at the top of a test page.
- Click the 3-dot icon above the test result video and select Create ticket in JIRA.
- Select the Jira board to use for the export.
- Select the platforms you want to include.
- Click the Export button.
What’s Included in the Jira Ticket
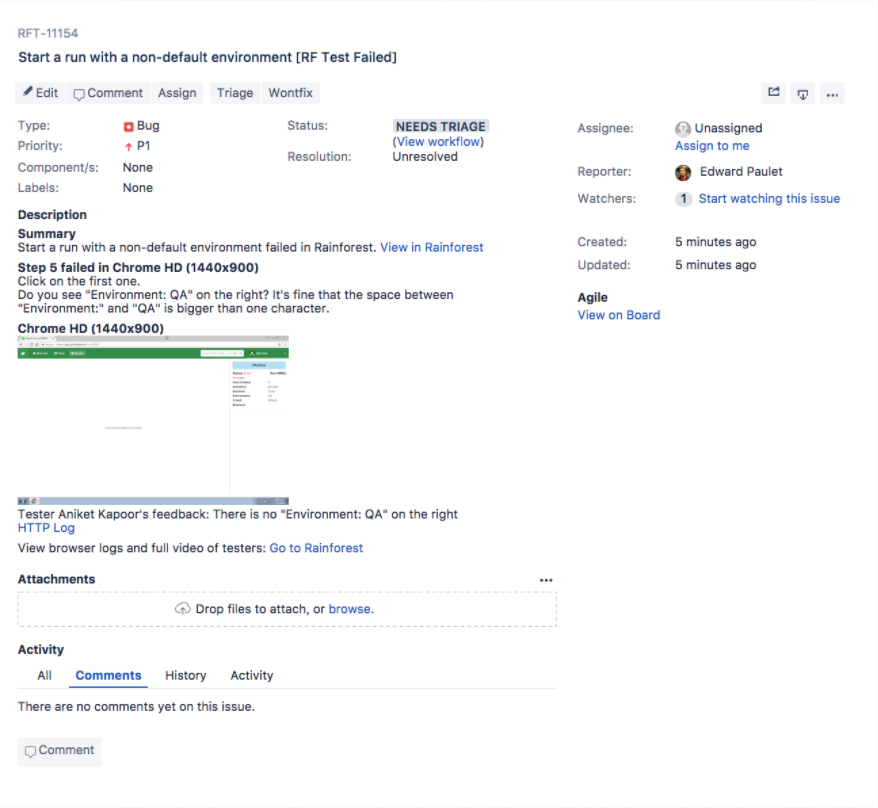
In the Jira ticket description, you’ll find:
- The failed test steps
- A screenshot from the failed step
- A link to the HTTP logs from each tester

Test failure information.
Jira Error Codes During Manual Export
Code 400. A generic error code, which could be due to a variety of factors:
- The Jira instance is missing required fields.
- The Jira ticket contains invalid field values.
- The Jira project contains fields that cannot be set for the issue type.
- The Jira ticket is being created by a user who does not have the necessary permissions.
- The Jira cannot create a sub-type in a project different from that of the parent issue.
- The Jira is trying to create a sub-task when the option to create sub-tasks is disabled.
Code 401. An authentication error.
Code 5nn. An unexpected server error. Try again later or contact support to diagnose.
For more information on Jira’s error codes, see Atlassian’s Jira REST API documentation.
If you have any questions, reach out to us at [email protected].
Updated 4 months ago
