
Quick Start Guide
Learn how to run Rainforest tests and integrate them into your QA workflow.
In this article, we cover:
- Writing and running your first test
- Setting up a testing schedule
- Integrating results notifications and bug reporting into your QA workflow
Writing and Running Your First Test
Rainforest lets you create functional, automated tests in a few minutes, with no code required.
Setting Up Sites and Environments
To get started, first choose where your test will run. Each test in Rainforest runs against a specific site and environment, such as staging vs. production. Setting these up correctly ensures your automated tests and AI-generated steps run against the right URL.
- On the Tests page, click Create Test.
- Select the site you want to test from the Start at action.
- Add a new site if the site isn't listed.
For more information about managing your sites and environments, see this article.
Site security is essential. To ensure access, see Accessing Test Environments.
Generating a test with AI
Start writing automated tests using generative AI by describing the user flow in a natural language prompt. The AI Agent then generates a full draft test with steps based on actions like Click, Type, and Hover targeting UI elements.
Example AI test prompt
Start on the login page, log in as a returning user, navigate to the products page, add one product to the cart, go to checkout, fill in dummy shipping and payment details, place the order, and confirm the ‘Order confirmed’ message is visible.
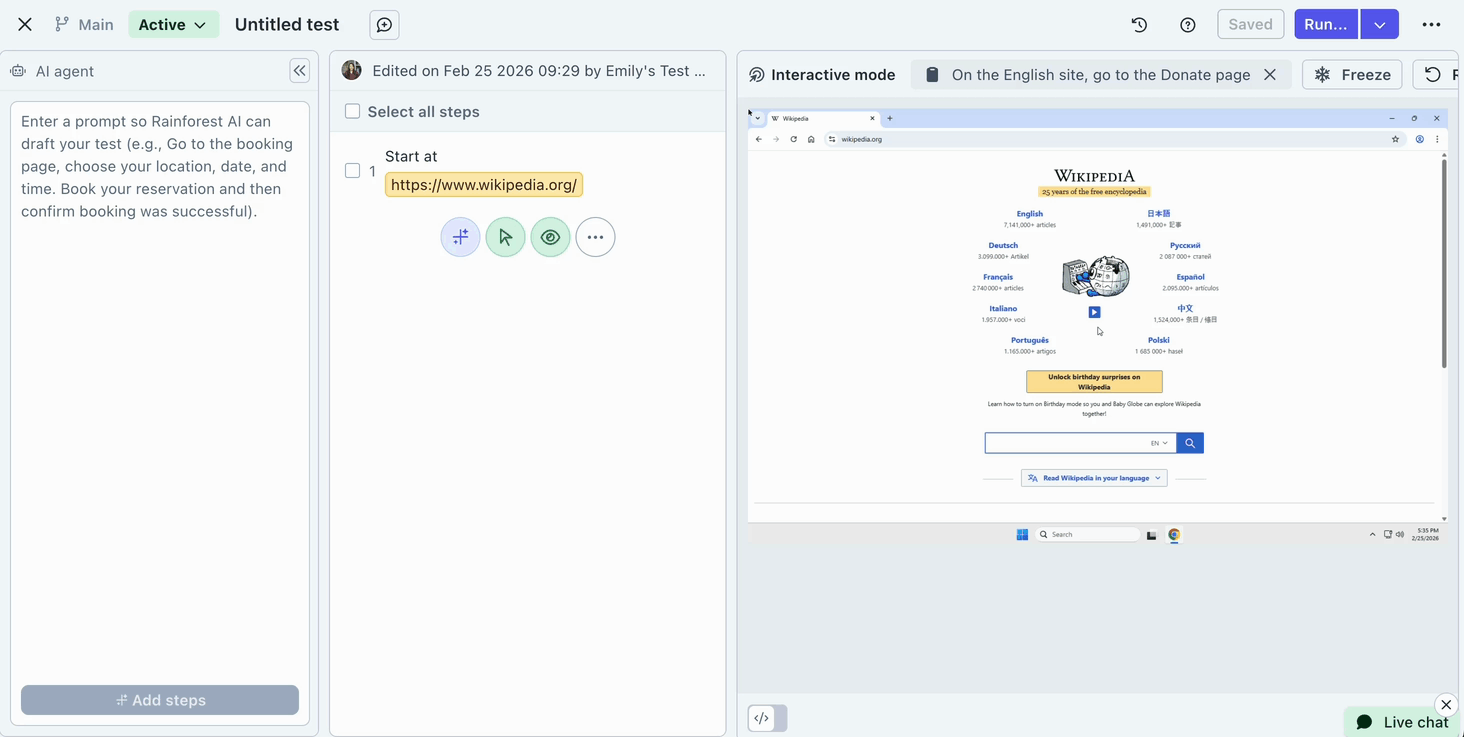
Enter a prompt for the AI agent to begin creating test steps.
Generating self-healing steps
When your UI changes but the underlying flow is still correct, Rainforest’s self‑healing can automatically regenerate steps so the test keeps passing without manual maintenance.
- Click on the Describe steps... to add OR click the ➕ button.
- Describe the action you wish to perform. For example:
- "Add a product to the cart"
- "Fill the form using dummy data"
- "Visit the signup page and create an account"
- Press the Enter key to generate test steps.
- View the underlying steps that were generated as part of the self‑healing snippet.
Review and edit AI-generated steps
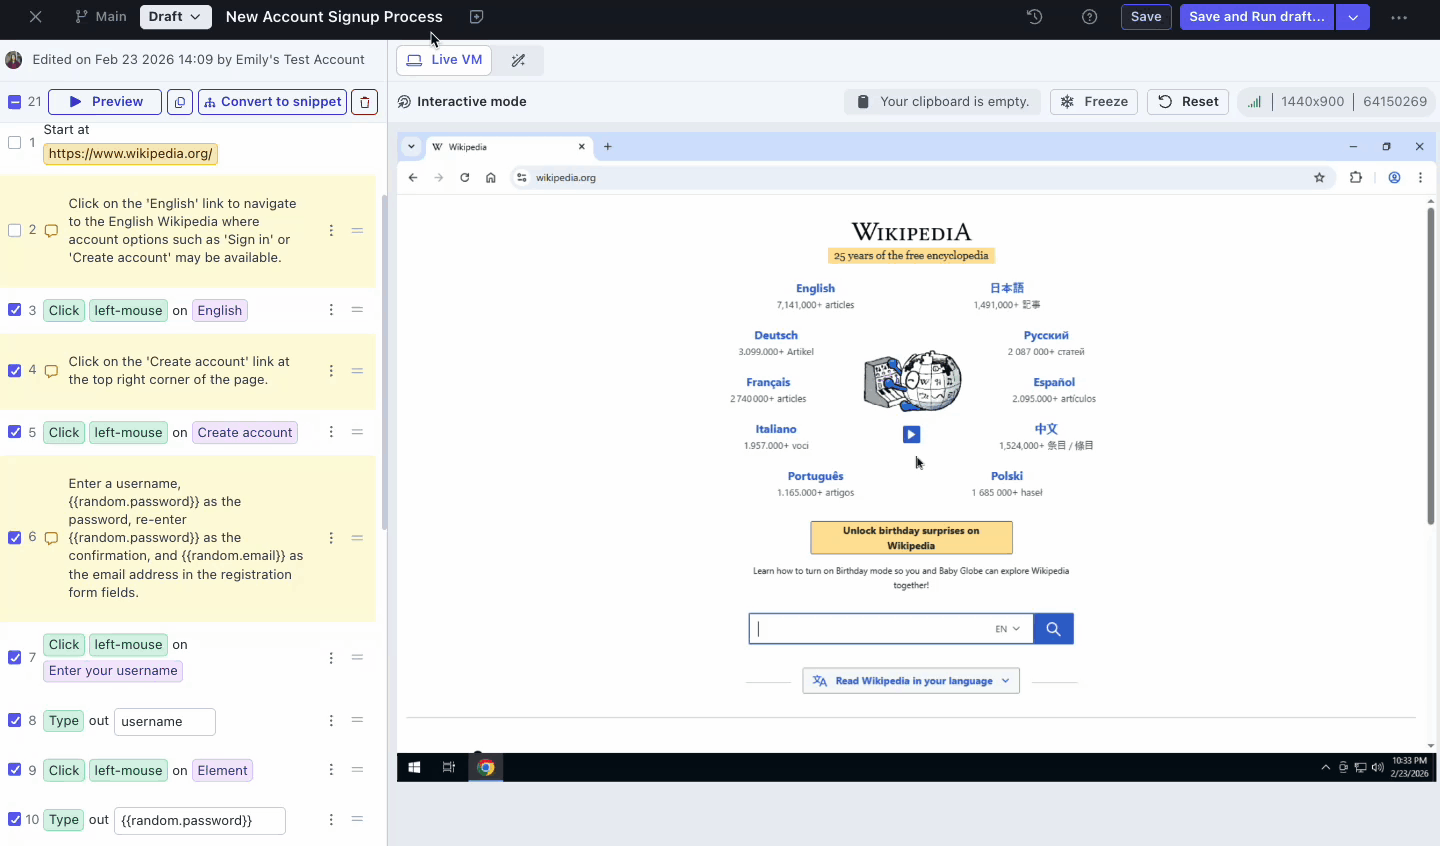
Preview the test steps to confirm that they match your intended test flow, then make updates, add actions, or remove steps as needed. Use Preview to replay steps in the virtual machine to make sure the actions are correct before you run the test.
Adding Steps
To insert a step:
- Click the plus sign (+) between the actions.
- Select an action or add a snippet.
Deleting a Step
- Select the step to delete by clicking the step number.
- Click trash icon (delete) at top of the Actions list.
Moving Steps
- Click the equal sign (=) to the right of the step.
- Drag the step up or down to the desired location.
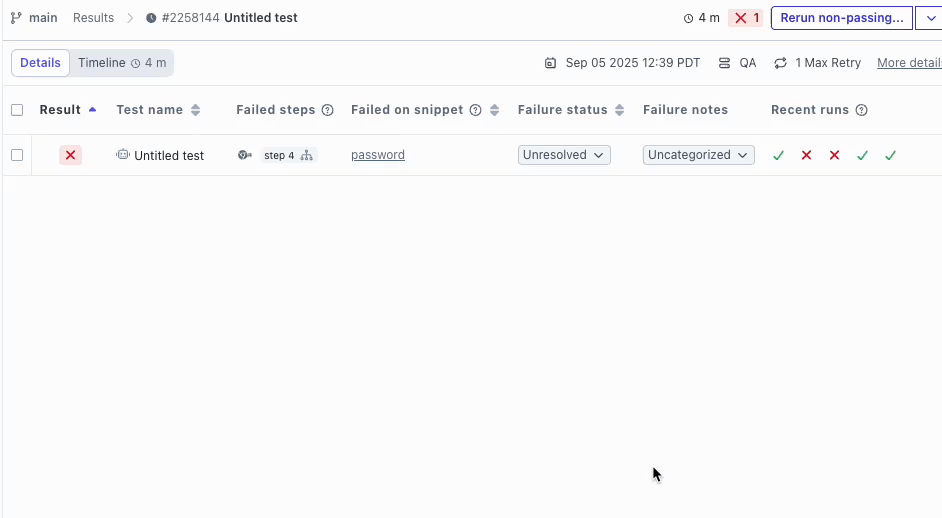
Triaging Test Results
Navigate to the Results page to view the test results. If your test passed, you’re all set. If not, determine where the failure occurred, make the correction, and run again.
- Find the failure reason. Use the video and screenshots to see exactly what happened, and then fix the step targeting or timing as needed. For more information, see Working with Automation Service Results.
- Categorize your failure. Failure categorization allows you to notify your team and build your to-do list on the Dashboard.
You can track your failure reasons over time using Rainforest Analytics and Reporting.
Setting Up Testing Schedules and Organizing Test Suites
Let’s set up a testing schedule. Run groups are often categorized by "Smoke", "Regression", etc. You can create and schedule them in the app, or kick them off programmatically using our CLI.
Setting up a run group
- Select Run Groups from the navigation menu.
- Create a Run Group.
- Set up a testing schedule. (Optional)
- On the Tests page, select any number of tests by clicking the checkboxes.
- Click the Bulk Actions dropdown and select Add to Run Group.
Once scheduled or integrated, runs will appear on the Results page.
Integrating Rainforest into the Workflow
- CI/CD Pipelines: Trigger tests automatically in your CI/CD pipeline with our GitHub Action, CircleCI Orb, or any CI/CD tool via the Rainforest CLI or API.
- Results Notifications:
Send notifications via email, Slack, or Microsoft Teams. - Failure Reporting:
Set up Jira Integration to create tickets from test failures with a single click.
FAQ
What are some best practices to reduce flaky tests?
- Use stable, meaningful elements instead of brittle ones (for example, avoid relying solely on images that change often).
- Add 'Wait' or 'Observe' actions where needed so the automation agent doesn’t move faster than your UI.
- Make sure your test environment states are reset or consistent on repeated runs.
- Keep each test focused on one core flow or outcome. Very long, multi-purpose tests are more likely to be flaky and hard to maintain.
- Use descriptive names for tests and elements so issues are easier to diagnose later.
What are common reasons a test suddenly becomes flaky?
- Elements that move or load slowly (may need better waits).
- Changes in selectors or page layout.
- Dependencies on external services or data that might be unstable.
Small tweaks to waits, elements, or test data often stabilize the test quickly.
How do I get the best results from AI test generation?
You’ll get better tests if your prompt is clear about the goal and key steps. Include:
- What the user is trying to do (for example, “sign up with email and confirm their email”).
- Important validations (for example, “see confirmation message and verified status”).
Then review the output from the AI test generation to check:
- The test actions match real user behavior.
- Observe actions and assertions verify the right things.
If you have any questions, reach out to us at [email protected].
Updated 5 months ago