Jira
Learn how to set up issue tracking in Jira for Rainforest tests.
Rainforest supports using Jira to automatically create a ticket when a test fails. This document walks through step-by-step instructions to set up your Jira integration.
Required Jira FieldsTo post issues to Jira, you must enable the following fields for your project:
- Issue Type
- Summary Description
Note: No other fields can be marked as required.
Setting Up a Jira Integration with Rainforest
Configuring a Jira integration with Rainforest takes place in two phases:
Setting Up a Rainforest Application Link in Jira
Before you can set up Rainforest as an application link, you need Jira admin access. If you do not see application links in your Jira instance, contact your Jira admin to request access.
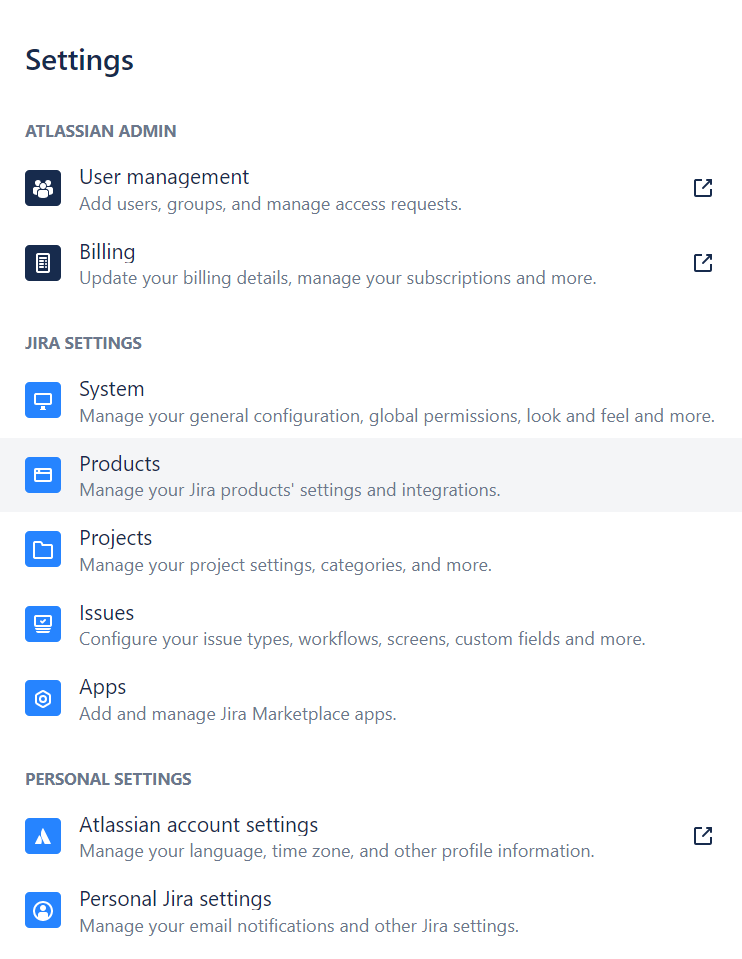
- From Jira’s main view, click the Settings icon (gear) and select “Products” in the modal.

Jira’s Settings modal.
- Click “Application links” in the left sidebar.

Selecting “Application links.”
- In the code sample below, click the clipboard icon to copy the URL.
https://www.rainforestqa.com/- Click the Create new link button.
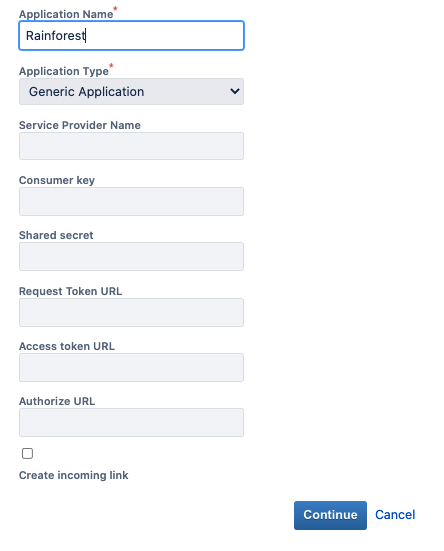
Note: You might see an error stating, “No response was received from the URL you entered.” Ignore it and proceed with the configuration. - Enter a name for the application, leave all other fields on the popup blank, and click Continue.

Enter an Application Name and select Continue.
- In the list of application links, click the pencil icon to the right of your link to edit.
- Select “Incoming Authentication.”
- In the code sample below, click the clipboard icon to copy the consumer key.
WjEUyzd78JaUeGgYWrDZNw- Paste the key into the Consumer Key field and press Enter.
- Enter a consumer name.
- In the code sample below, click the clipboard icon to copy the public key.
-----BEGIN PUBLIC KEY-----
MIIBIjANBgkqhkiG9w0BAQEFAAOCAQ8AMIIBCgKCAQEA4edeTLpAi2vLpOPYMtyN53RktN8qIMXNuSacUJazjiBRCIfOmbm1zIlxTvTKnHN+eEWhTSbJzEobA16lBQnB4qmQL0sNmkUPrYHhAytyvBy1rcK1RWIe5ak1Je0opHx9D3QvVIKyOoRsL5trfOV91znPrO69PVNci+X/z2fEWeZSnLdqEG75KgVdQzGaaSGIo5DFz66WBG0RmCsFMTYrsi1ZhmFBLjiD7wXFJj76KF5nQpTeNJq1Grpy/QXg+vt65u0TPrq+6wa3TLOJCEX8VT5eNtfqUmWT3Bka6YOzs7UJQu2lIFIagQmbtj/Fs5lkVa2O5Escv0vP2gAGqiFjWwIDAQAB

-----END PUBLIC KEY------ Paste the key into the Public Key field and press Enter.
- Click the Save button.
Configuring Jira on the Rainforest Integrations Page
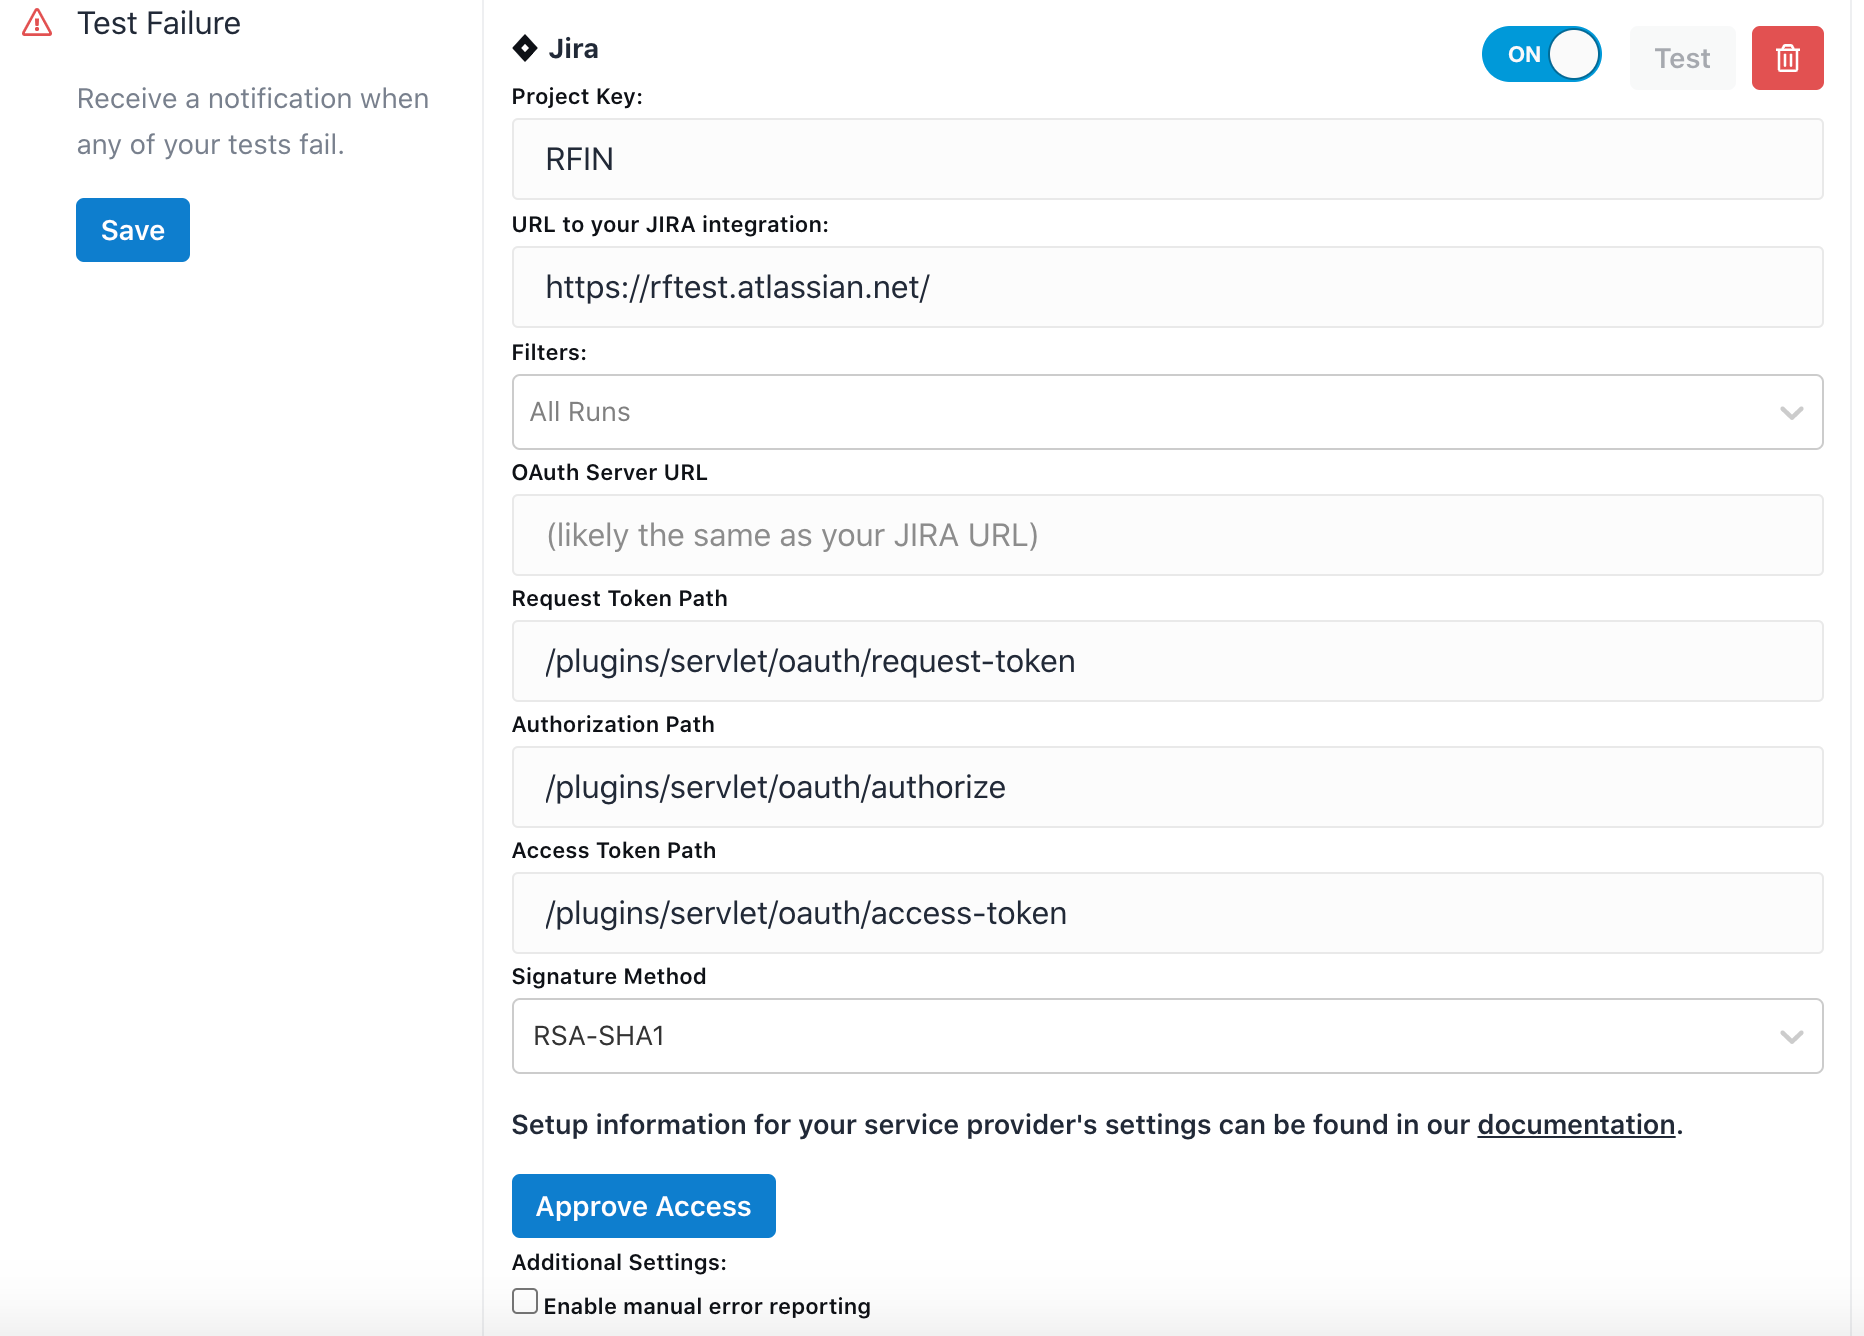
- Go to your Rainforest Settings > Integrations Page and start a new Test Failure integration.
- Enter the project key from your project (found in the Key column in the main Jira view).
- Key in your Jira project’s URL.

Jira test failure integration.
- In the OAuth Server URL field, key in the URL for your Jira project again.
- Click the Approve Access button.
Note: You must be logged in as an administrator in Jira and Rainforest. - Click the Allow button on the next page.
- On your Rainforest Settings page, click Test in your Jira integration to ensure there are no errors.
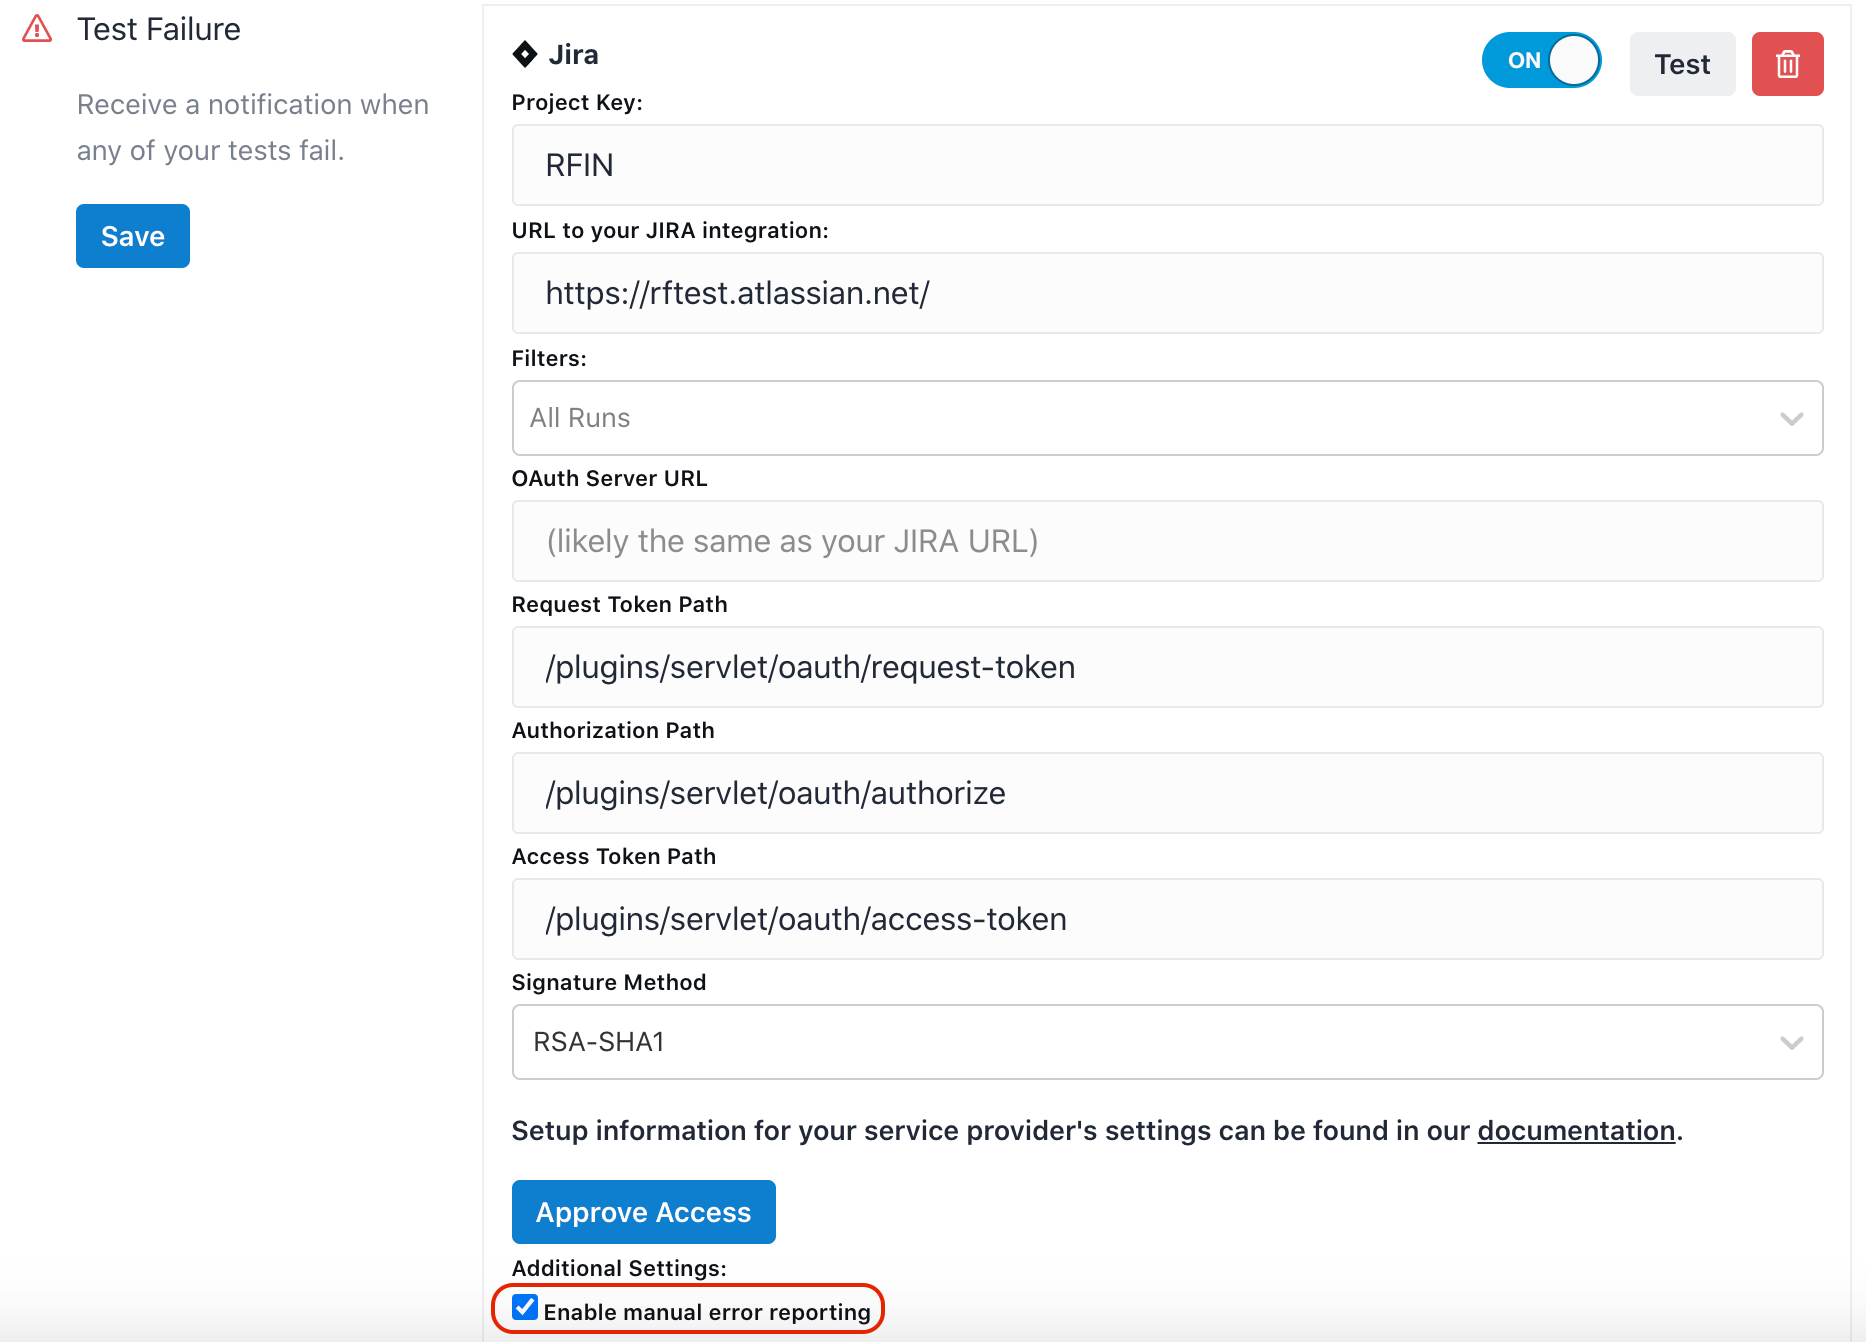
Note: Clicking “Enable manual error reporting” allows you to submit an error to Jira while viewing it in the Rainforest UI.

Enabling manual error reporting.
Oauth Server URL is often the same URL as your Jira integration’s URL.
For the Request Token Path, Authorization Path, and Access Token Path fields, key in the path only; you do not need to include a fully qualified URL.
If you have any questions, reach out to us at [email protected].
Updated 5 months ago
