How to Create and Remove a Tag
Learn how to work with tags in Visual Editor and Plain-Text Editor tests.
When working with tags, keep in mind the following:
- Tags are case sensitive.
- Tests can contain multiple tags.
- You can’t remove a tag from a group of tests all at once; you must delete them individually.
Adding Tags from the Tests Page
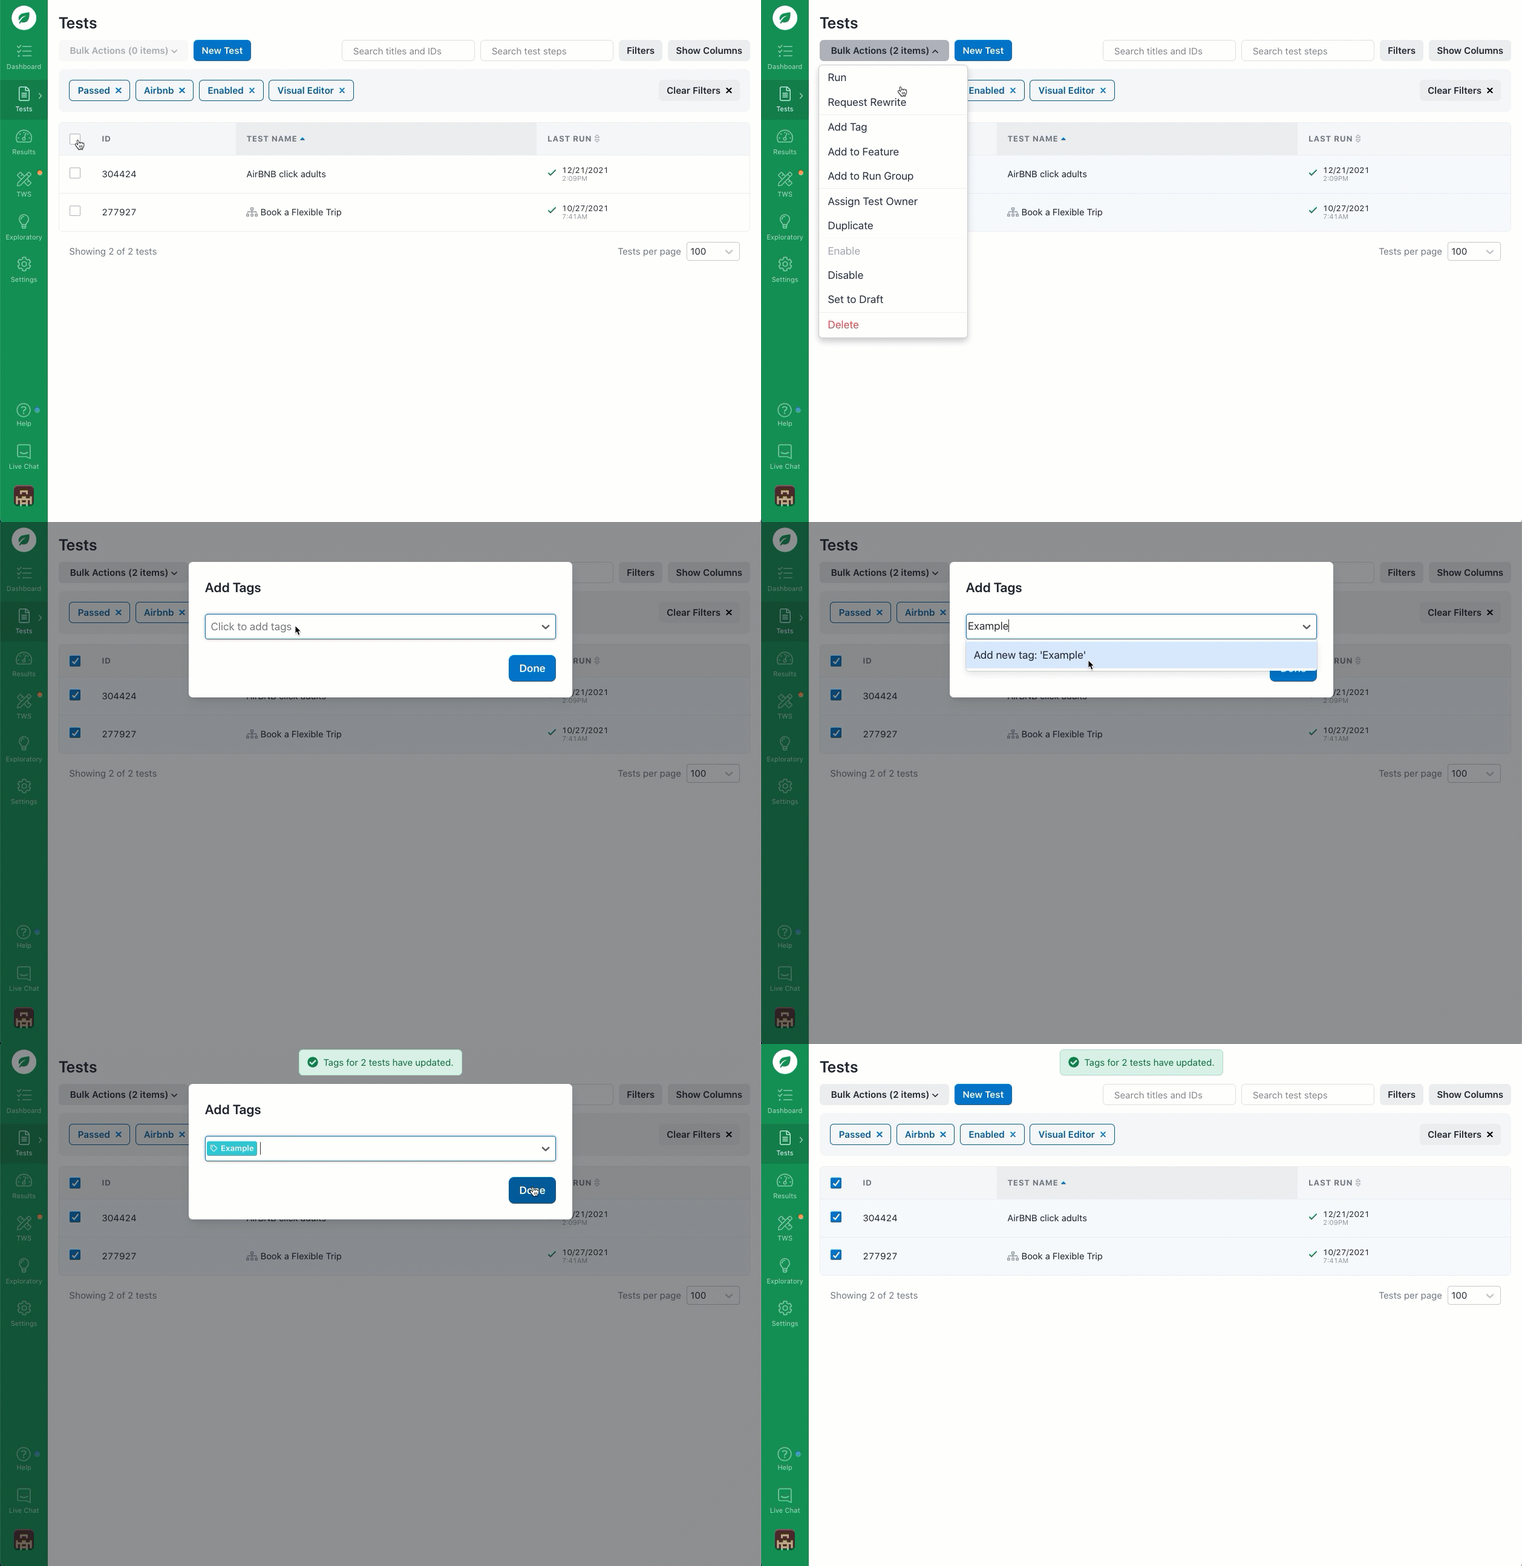
- Click the Tests icon (paper) in the navigation bar, then select Tests.
- Click the checkboxes for the tests you want to include.
- Click the Bulk Actions menu and Add Tag.
- Select a tag from the dropdown or key in a new tag name.

Adding a tag from the All Tests page.
Note: You can also add tags on the Features and Run Groups pages by selecting the tests, then clicking the Tag icon.
Adding a Tag in a Visual Editor Test
- Select a test.
- Click the Settings icon (gear).
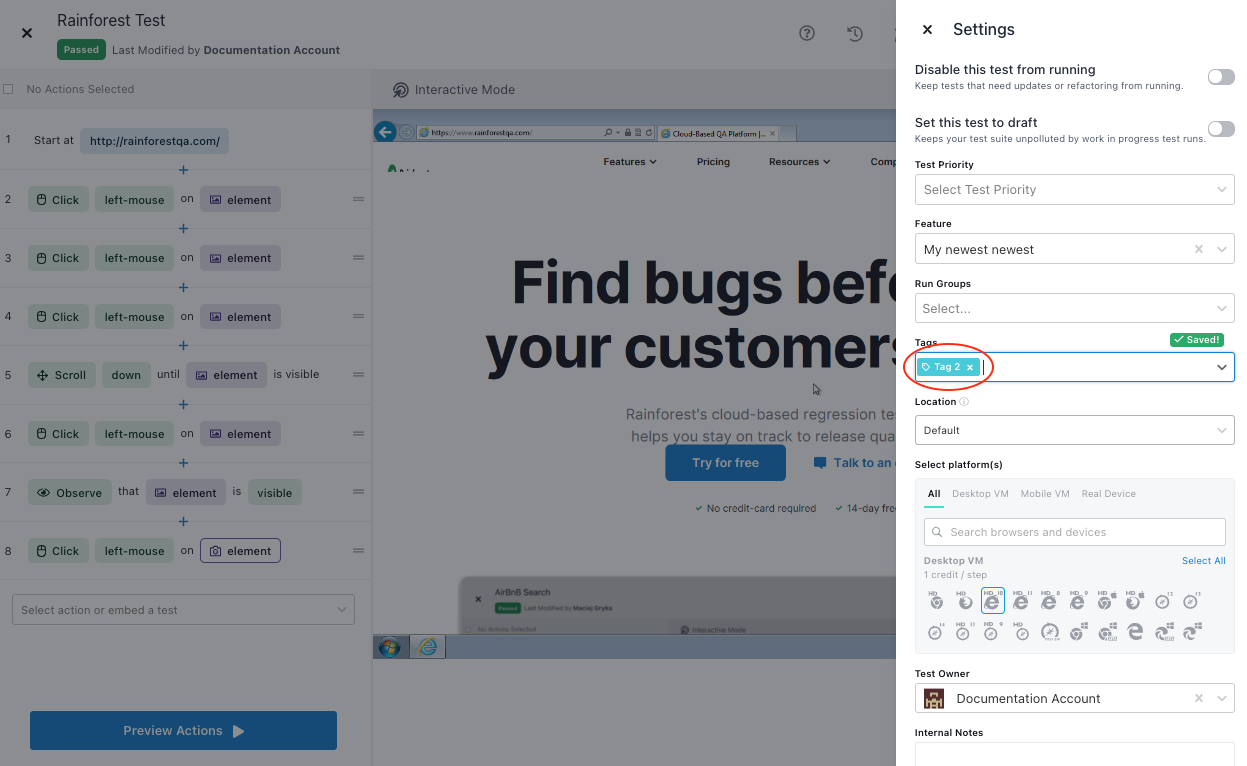
- On the Settings panel, click the Tags field.
- Select a tag from the dropdown or enter in a new tag name.
Removing a Tag in a Plain-Text Editor Test
- Select a test.
- Click the Settings icon (gear).
- On the Settings panel, click the Tags field.
- Click the “X” next to a tag to remove it.

A tag in a Visual Editor test.
Adding a Tag in a Plain-Text Editor Test
- Select a test.
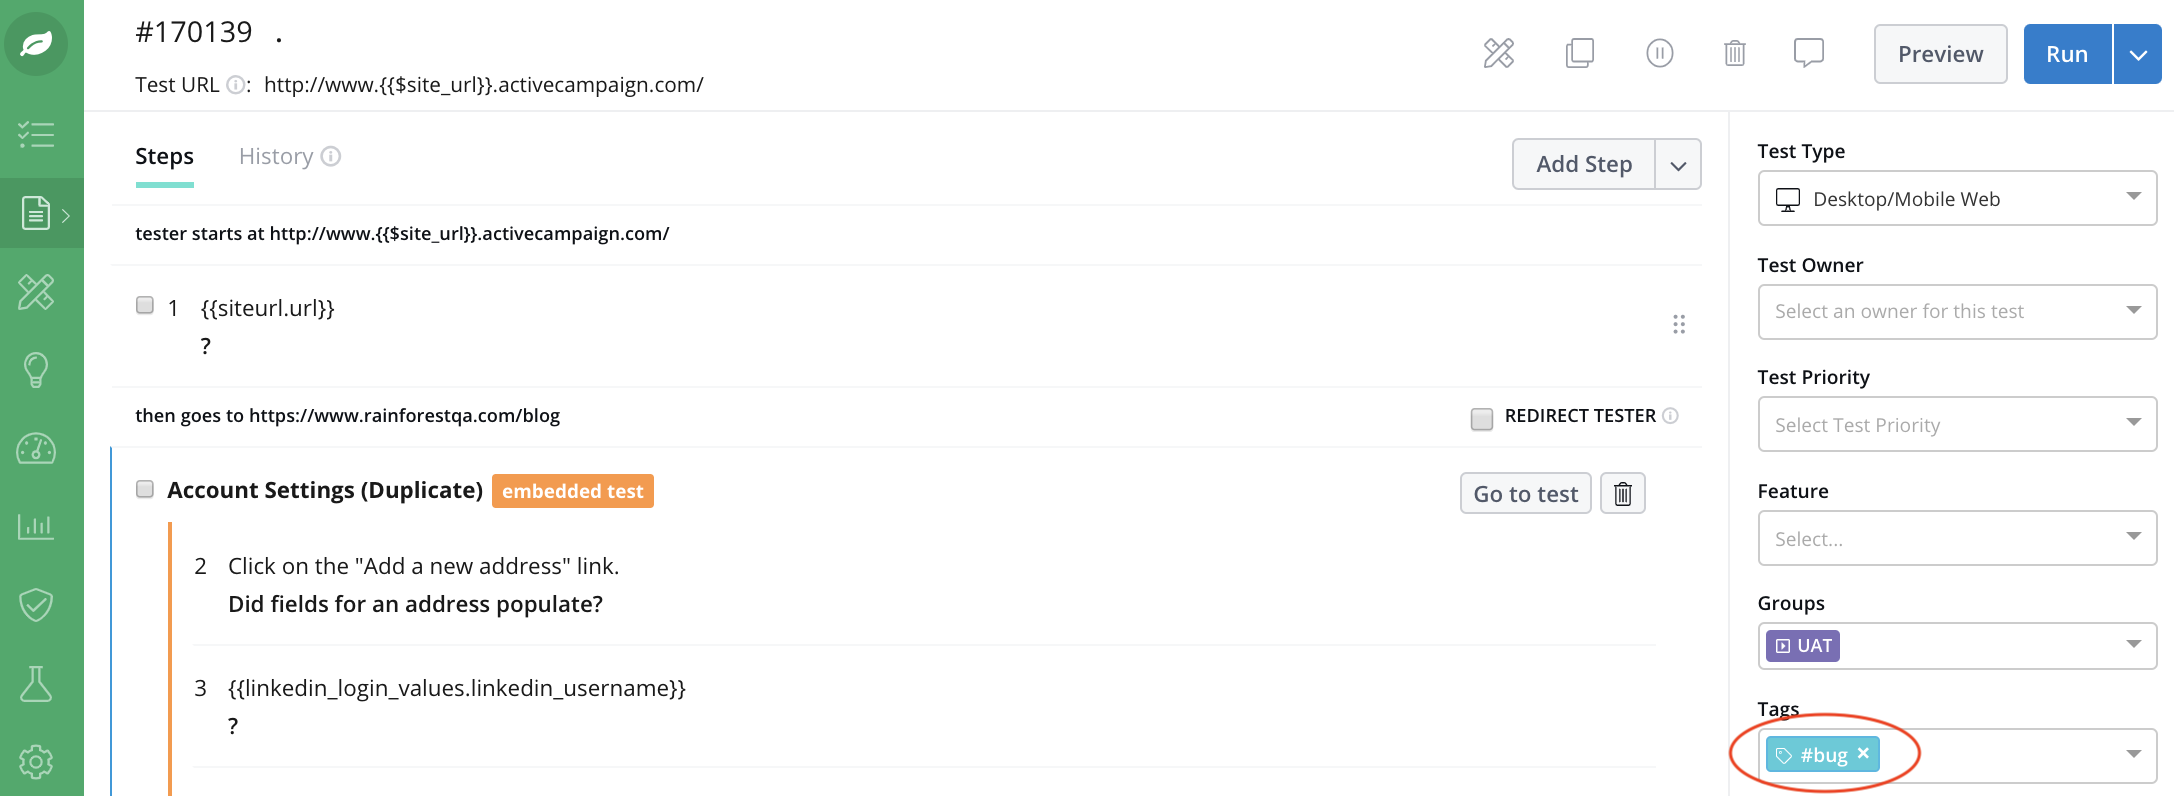
- On the Settings panel, click the Tags field.
- Select a tag from the dropdown or enter in a new tag name.
Removing a Tag in a Plain-Text Editor Test
- Select a test.
- On the Settings panel, click the Tags field.
- Click the “X” next to a tag to remove it.

A tag in a Plain-Text Editor test.
For more information on tags, see How to Edit and Delete a Tag.
If you have any questions, reach out to us at [email protected].
Updated 5 months ago
Related Articles & Links
